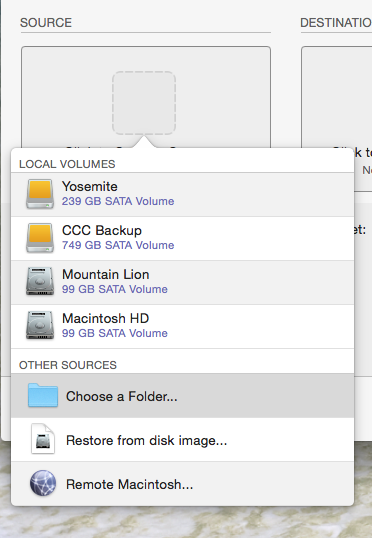
Choose your source
From the Source selector, select Choose a Folder...
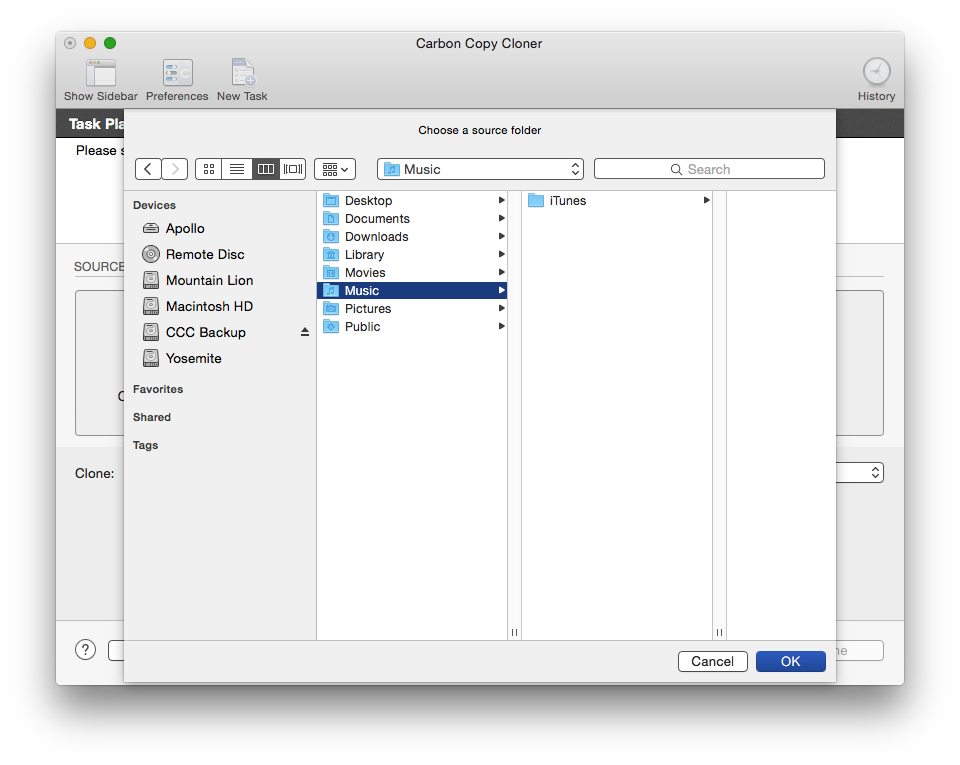
Select your source folder and click OK.
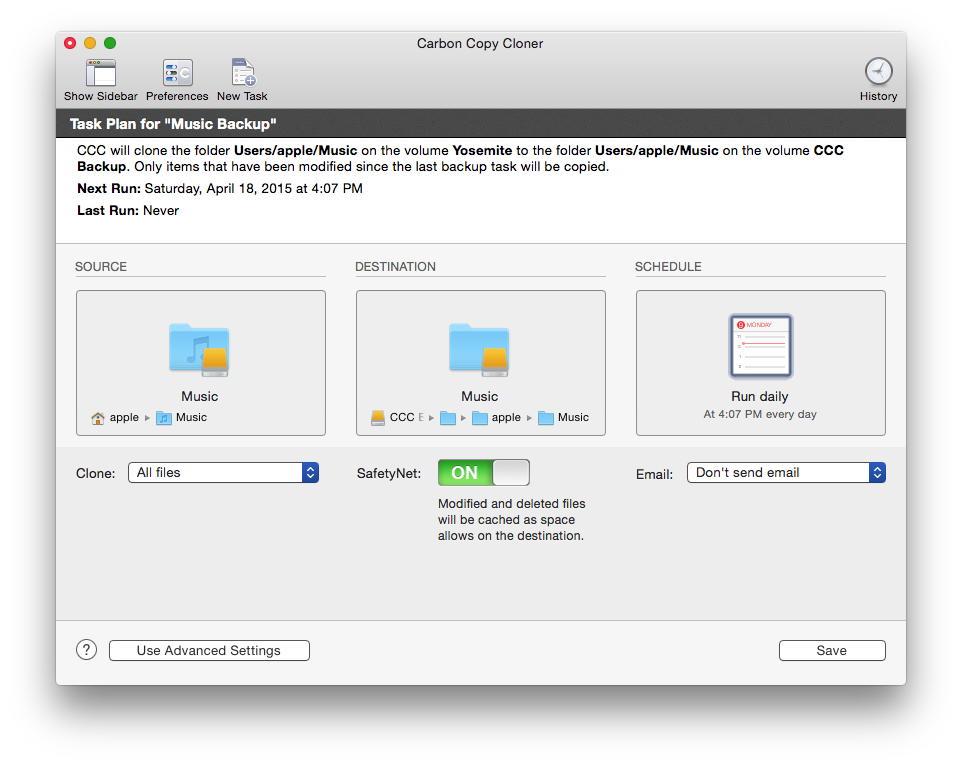
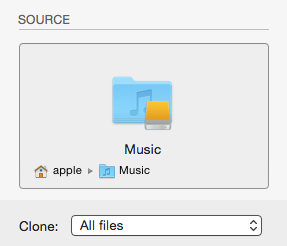
When correctly selected, the Source selector should display a folder icon and a path to the folder beneath it. Note that this path may be truncated but if you mouse over it, individual items will be expanded. You may choose to clone All files, the default, or choose to exclude selected files by using the Clone menu.
Choose your destination
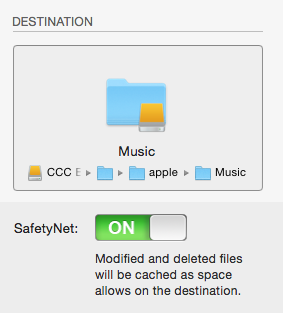
The steps used to select the source need to be repeated for the destination. CCC also supports drag and drop selection, so we'll demonstrate that here. Find your destination folder in the Finder, then drag it onto CCC's Destination selector.
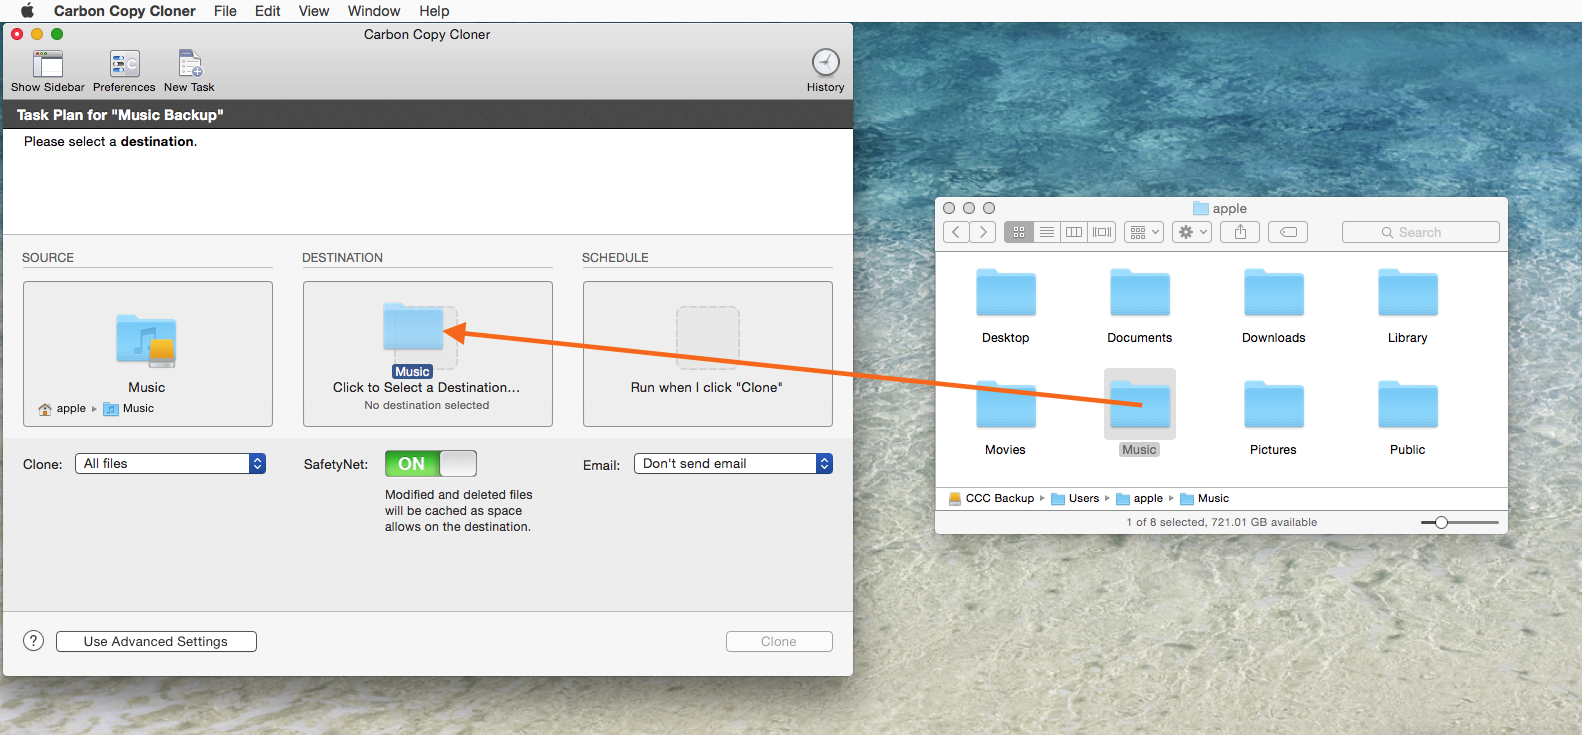
Once you have selected the destination folder, the Destination box should have a folder icon in it with the path displayed beneath it. You may choose to leave SafetyNet on or turn it off. To learn more about SafetyNet, please see Protecting data that is already on your destination volume: The Carbon Copy Cloner SafetyNet.
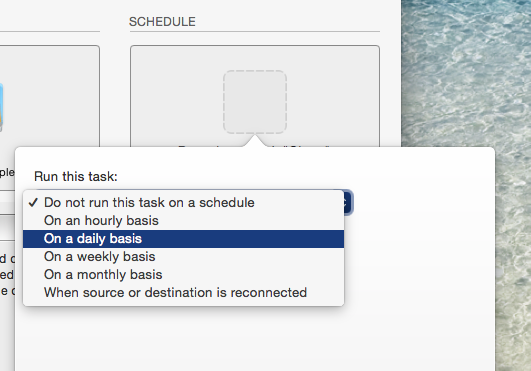
Schedule the backup
Click in the Schedule box and design a backup schedule that meets your needs. Click Done when you have finished.
Save and clone
Once you have your source, destination and schedule complete, click on Save in the bottom right-hand corner. This will save the task and you can find it in the tasks area on the left sidebar. If you don't see the sidebar, click on Show Sidebar in the CCC window header. You may click the Clone button to run the backup manually, or let it run on a schedule.