CCC is fully qualified for use with FileVault-protected volumes (HFS+ and APFS). CCC offers some advice around enabling encryption in the Disk Center.
Enabling encryption on a volume that contains (or will contain) an installation of macOS
If your goal is to create a bootable, encrypted backup, use the following procedure:
- Follow CCC's documentation to properly format the destination volume. Do not format the volume as encrypted. Choose APFS if your Mac is a T2 Mac (e.g. iMac Pro, 2018 MacBook Pro; see the full list here).
- Use CCC to back up your startup disk to the unencrypted destination volume.
- If you're running an OS older than Mojave, select the destination volume in CCC's sidebar, then click the Recovery HD button to create a Recovery HD volume. Note: You must be logged in to an administrator account to perform this step. This step is unnecessary if your destination is an APFS-formatted volume.
- Hold down the Option key (Intel Macs) or the Power button (Apple Silicon Macs) while restarting your Mac and choose the backup volume as the startup disk.
- Enable FileVault encryption in the Security & Privacy preference pane of the System Preferences application.
- Configure CCC for regular backups to your encrypted backup volume.
You do not have to wait for the conversion process to complete before rebooting from your production startup disk
Additionally, you do not have to wait for the conversion process to complete before using your backup disk. You can simply enable FileVault encryption, then immediately reboot from your primary startup disk and the conversion process will carry on in the background. Encryption will continue as long as the backup disk is attached. macOS doesn't offer a convenient method to see conversion progress, but you can type diskutil apfs list (or diskutil cs list if the applicable volume is HFS+ formatted) in the Terminal application to see conversion progress. Some users have found that conversion may not resume until you log in to an admin account while booted from your production startup volume, so try that if conversion appears to be stalled.
Keep your Mac plugged into AC power for the duration of encryption conversion
We have received a handful of reports from macOS Catalina users indicating that encryption conversion remains permanently paused if AC power is removed during the encryption conversion process. We have been unable to reproduce this result in our test lab — typically encryption conversion pauses when AC power is removed, but then resumes when AC power is restored. The number of reports to us, however, suggests that there is some underlying problem that may be new to macOS Catalina. To avoid this result, we recommend that you keep your Mac plugged in to AC power for the duration of encryption conversion. If you see an indication that encryption conversion is paused, try leaving the system plugged into AC overnight.
What if I don't want my personal data to ever be on the destination in unencrypted form?
Enabling FileVault on the destination means that the volume starts out unencrypted, and then over the course of several hours the data is encrypted in place. If the encryption conversion process completes successfully, then for most intents and purposes, no trace of the unencrypted data will be left on that disk. There are some caveats however. If your backup volume is an SSD, and if you delete files from the SSD prior to enabling encryption, then the SSD may automatically move the not-yet-encrypted underlying blocks out of rotation (for wear leveling), and those data could be recoverable by experts. Likewise, if the conversion process fails for any reason, then the data on that disk is potentially recoverable. If either of these scenarios is not acceptable, then we recommend that you exclude any sensitive data from the initial backup task. Don't exclude your whole home folder — you must include at least one folder from your home directory so that you can log in to that account on the backup.
After you have booted from the backup volume and enabled FileVault, you can then reboot from the production startup disk, remove the exclusions from your backup task, then run the backup task again to copy the remainder of your data. Any data that is copied to a volume that is in the midst of encryption conversion will be encrypted immediately.
Note for Big Sur users: When prompted to erase the destination, proceed with a Data-only backup instead. You will not be able to exclude content from a Full Volume Clone. After the initial backup has completed, proceed to install Big Sur onto the destination. After installation has completed, enable FileVault, then reboot from your production startup disk and run your CCC backup task again without the exclusions.
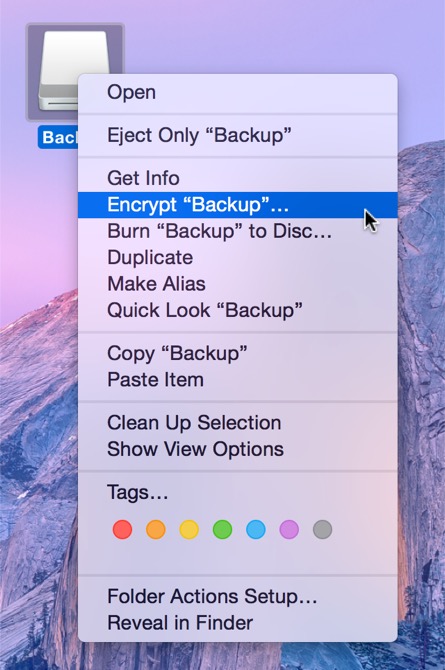
Enabling encryption on a volume that will not contain an installation of macOS
If your backup volume won't be a bootable backup of macOS, simply right-click on that volume in the Finder and choose the option to encrypt the volume. If your Mac is running macOS High Sierra or later, please note that macOS will convert an HFS+ formatted volume to APFS when you enable encryption in this manner.