- Restoring data to a new or different Mac, or to a clean installation of macOS on the same Mac
- Restoring individual files from a backup
- Restoring a folder from a backup
- Restoring from a backup using CCC
- Restoring an older version of a backup
- Restoring older versions of files using CCC's Snapshot Navigator
- Restoring files to your destination from a SafetyNet Snapshot
- Using Migration Assistant to restore your startup disk from a CCC backup
- Working around Migration Assistant restrictions
- Restoring your startup disk from a legacy bootable copy of macOS
- Restoring from a backup on a NAS or network share
- Restoring a home folder from a backup on a NAS to a clean install of macOS
- Migrating data from an Apple Silicon Mac booted in "Share Disk" mode
- Restoring from a disk image
- Restoring from a backup on a remote Macintosh
Restoring data to a new or different Mac, or to a clean installation of macOS on the same Mac
If you are trying to restore all of your data to a new or different Mac, or to a clean installation of macOS on the same Mac, you should generally use Migration Assistant to migrate that data; do not perform the restore with CCC.
Related Documentation
Restoring individual files from a backup
Drag and drop via the Finder
How to find and restore individual files and folders from your CCC backup
You can restore individual items from your backup volume in the Finder via drag and drop — simply find that item on the backup disk, then drag it back to your startup disk. If the item you're looking for is hidden, or resides in a hidden folder, you can press Command+Shift+Period to toggle the Finder's display of hidden items.
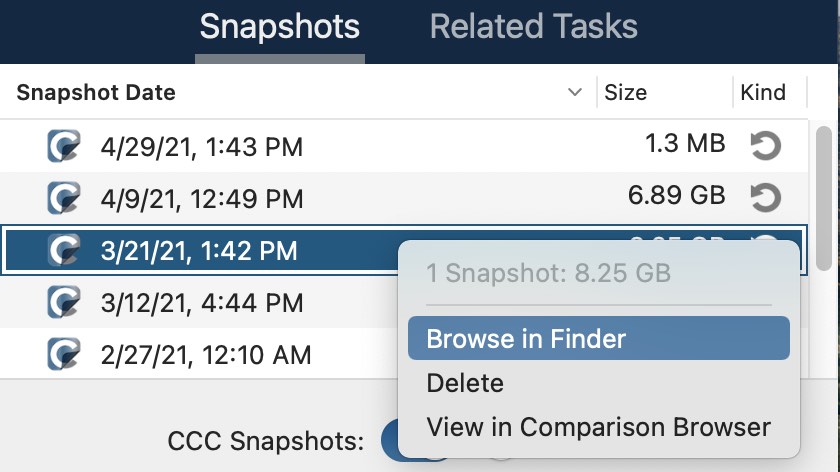
If you would like to restore an older version of a file, you can restore that from a CCC snapshot (what's a snapshot?). Select your destination volume in CCC's sidebar, then double-click on a snapshot to reveal the snapshot in the Finder. The snapshot is mounted read-only, so it is impossible for you to make any harmful modifications to the snapshot. If you would like to restore a single item, you can simply drag the item from the snapshot to wherever you want to restore it to.
If you're trying to restore system files, applications, or perhaps everything from your backup, proceed with one of the other methods indicated below.
Restoring a backup using CCC
Restoring an entire volume from a CCC backup
Restoring data to your startup disk from a CCC backup
If you're working with a larger amount of content to restore, CCC can usually do it more efficiently than the Finder:
- Quit all applications other than CCC
- Click the Restore button in CCC's toolbar.
- Click on the Source selector and choose your backup volume as the source.
- Click on the Destination selector and choose your original source volume as the destination (e.g. "Macintosh HD").
- If you are not trying to restore the entire backup, click the Task Filter button at the bottom of the window. Click the Include button in the toolbar, then explicitly select items that you would like CCC to restore.
- Consider the warning below. If you do not want CCC to remove anything from the destination, click on the Destination selector and choose Don't delete anything from the SafetyNet submenu.
- Click the Start button
Warning: When CCC restores content from the backup, files that aren't on the source may be removed from the destination. That's deliberate, and usually required to produce the outcome you expect. Please note, however, that if you excluded something from your backup, that content will be removed during the restore procedure. If you do not want that result, click on the Destination selector and choose "Don't delete anything" from the SafetyNet submenu.
Note: Some background services may not "notice" the restored data until they are restarted (e.g. because they store state data in memory). Reboot after restoring if you're restoring data to your home folder.
Restoring a folder from a CCC backup
Restoring a folder from a CCC backup
If you're trying to restore a specific folder, you should refine the scope of your restore task to avoid unintentional modifications to other content on the volume you're restoring to:
- Quit all applications other than CCC
- Click the Restore button in CCC's toolbar.
- Click on the Source selector and choose Choose a folder. Select the folder on your backup volume that you would like to restore.
- Click on the Destination selector and choose Choose a folder. Select the folder on your original source volume that you would like to restore to. Typically this folder will follow the same path as the source. E.g. if you are restoring (your backup disk) > Users > yourname > Desktop folder, you should select Macintosh HD > Users > yourname > Desktop as the destination.
- If you do not want CCC to remove anything from the destination, click on the Destination selector and choose Don't delete anything from the SafetyNet submenu.
- Click the Start button
Restoring an older version of a backup
Restoring an older version of a backup
If you would like to restore an older version of a backup, you can restore from a snapshot on your backup disk.
- Quit all applications other than CCC
- Click the Restore button in CCC's toolbar.
- Select your backup disk as the source to the task.
- Click on the source selector and select a specific snapshot from the "available snapshots" menu.
- Click on the Destination selector to select a destination volume or folder.
- Click the Start button to run the task.

Restoring older versions of files using CCC's Snapshot Navigator
Restoring an older version of a specific file from a CCC backup
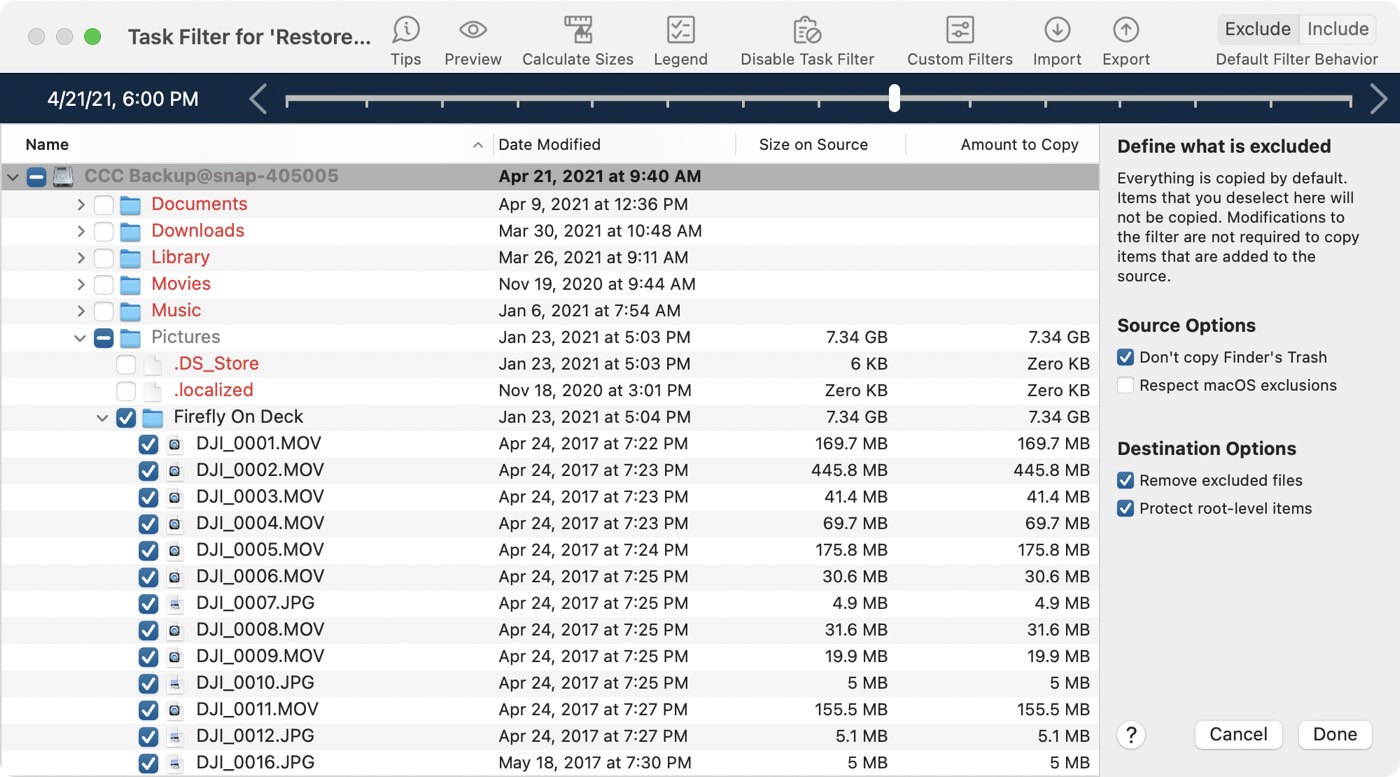
If you're planning to restore specific items, and especially if you would like to compare the contents of snapshots or look for a specific version of a file, you can use CCC's Snapshot Navigator:
- Quit all applications other than CCC
- Click the Restore button in CCC's toolbar
- Select a source volume, or a specific folder from your backup disk if you're restoring just a particular folder
- Click on the Task Filter button at the bottom of the window to open the snapshot navigation interface
- Click the Include button in the toolbar to set the Default Filter Behavior to Define what is included
- Find the version of your files and folders that you would like to restore (see below for additional detail)
- Check the boxes next to the items that you want to restore
- Click the Done button
- Click on the Destination selector to select a destination volume or folder
- If you're not restoring the entire backup, click on the Destination selector and choose Don't delete anything from the SafetyNet submenu
- Click the Start button to run the task
In the Task Filter window, use the slider to select specific snapshots. Alternatively, select an individual file that you're interested in restoring, then use the arrow buttons at the ends of the slider to navigate to previous and next versions of the file. When you have found the version of the item you would like to restore, you can either right-click on the item to reveal it in the Finder (then drag and drop the file to wherever you'd like to restore it to), or you can configure the task filter to restore specific items to a selected destination.
Note: Some background services may not "notice" the restored data until they are restarted (e.g. because they store state data in memory). Reboot after restoring if you're restoring data to your home folder.
Restoring files to your destination from a SafetyNet Snapshot
Undoing a backup that was made to the wrong disk
SafetyNet is a mechanism that is designed to protect files on your destination volume from accidental deletion. If you errantly selected the wrong volume as a destination, or if you were storing files on your destination that were unrelated to the source data set and you're now missing those files, you can restore those files to your destination from a SafetyNet Snapshot.
- Open CCC and select the affected destination volume from CCC's sidebar.
- Select the applicable SafetyNet Snapshot in the snapshots table.
- Click the Restore... button.
- Verify the settings of the task that CCC creates for you, then click the Start button.
When you proceed with this restore task, CCC will copy the files from the snapshot back to your selected destination. Keep in mind that CCC cannot delete the snapshot that holds the files that you're restoring prior to restoring those files to the destination. As a result, the destination must have enough additional free space to accommodate a copy of all of the files that you're restoring. In some cases, it may not be practical to restore files back to the original destination, you may need to recover them to another disk first.
Related Documentation:
- Excluding files and folders from a backup task
- "Why does CCC report that the destination is full when it appears to have enough room for newer files?"
Using Migration Assistant to restore your startup disk from a CCC backup
Recovering your Mac from a CCC backup
You can use Migration Assistant to migrate data from a CCC backup on locally-attached storage to a clean installation of macOS. Follow these steps to reinstall macOS and restore your data:
- Boot your Mac while holding down Command+R (Intel Macs) or the Power button (Apple Silicon Macs) to boot into Recovery Mode.
- Use Disk Utility to erase your Mac's (new) internal disk as APFS (see this Kbase article for additional guidance).
- Quit Disk Utility.
- Select the Reinstall macOS option and proceed to install macOS onto your new disk.
- When macOS boots for the first time on your new disk, you will be prompted to migrate data — accept the migration offer.
- When prompted to select a source for the migration, select your CCC backup volume† and proceed as directed by Migration Assistant.
† Big Sur (and older OSes): Migration Assistant won't list volumes that are encrypted and locked (i.e. not mounted), and won't helpfully offer any UI for unlocking and mounting those volumes. If you would like to migrate data from an encrypted volume, proceed with creating a new user account instead. After logging in, you'll be prompted to unlock the volume, and then you can open Migration Assistant (Applications > Utilities > Migration Assistant.app) and proceed with the migration.
Migration Assistant will not accept a backup on NAS storage as a source for migration. Use the method described below to restore files and folders from a NAS backup.
Related Documentation
Working around Migration Assistant restrictions
There are a handful of cases where Migration Assistant will not accept a volume as a source for migrating content. For example, if you have a volume that is formatted as case-sensitive, Migration Assistant will not allow you to migrate content from that volume to a case-insensitive-formatted startup disk. Likewise, if any user account resources are missing from the volume (e.g. because they were excluded from the backup, or because they are damaged), Migration Assistant will not accept it as a source. CCC can help with these cases.
- If you're currently proceeding through the first-boot Setup Assistant, decline the migration offer and instead proceed to create a new user account.
- Open Disk Utility
- Choose "Show all devices" from the View menu
- Select the startup disk (any volume associated with the startup disk, or its parent container)
- Click the "+" button in the toolbar to add a new volume. Name it "Macintosh", or something like that (something that you can live with long-term).
- Open CCC and configure a new task to restore your backup to the "Macintosh" volume (You may also restore an older version of your backup)
- When the task has completed, install macOS onto the "Macintosh" volume
- When the macOS installation is complete, go back to Disk Utility and delete the "Macintosh HD" volume group to free up the space that it's using.
Restoring your startup disk from a legacy bootable copy of macOS
These instructions are only applicable to macOS Catalina. We recommend that you use the instructions in this previous section to restore the startup disk on a Mac running Big Sur or later.
1. Boot your Mac from the backup disk
Attach the backup disk to your Mac using a USB or Thunderbolt cable.
Hold down the Option key as you start up your Mac. Your backup disk should appear as a startup disk option in the Startup Manager.
Note: If you cannot boot your Mac from your backup disk, use the alternate procedure documented above.
2. Prepare the disk that you're restoring to
Unless you're restoring just a handful of individual files, we recommend that you restore your backup to a freshly-formatted disk. See Preparing your backup disk for a backup of macOS for complete instructions on how to format the destination. Please note that this is especially important when restoring a macOS startup disk.
3. Open CCC
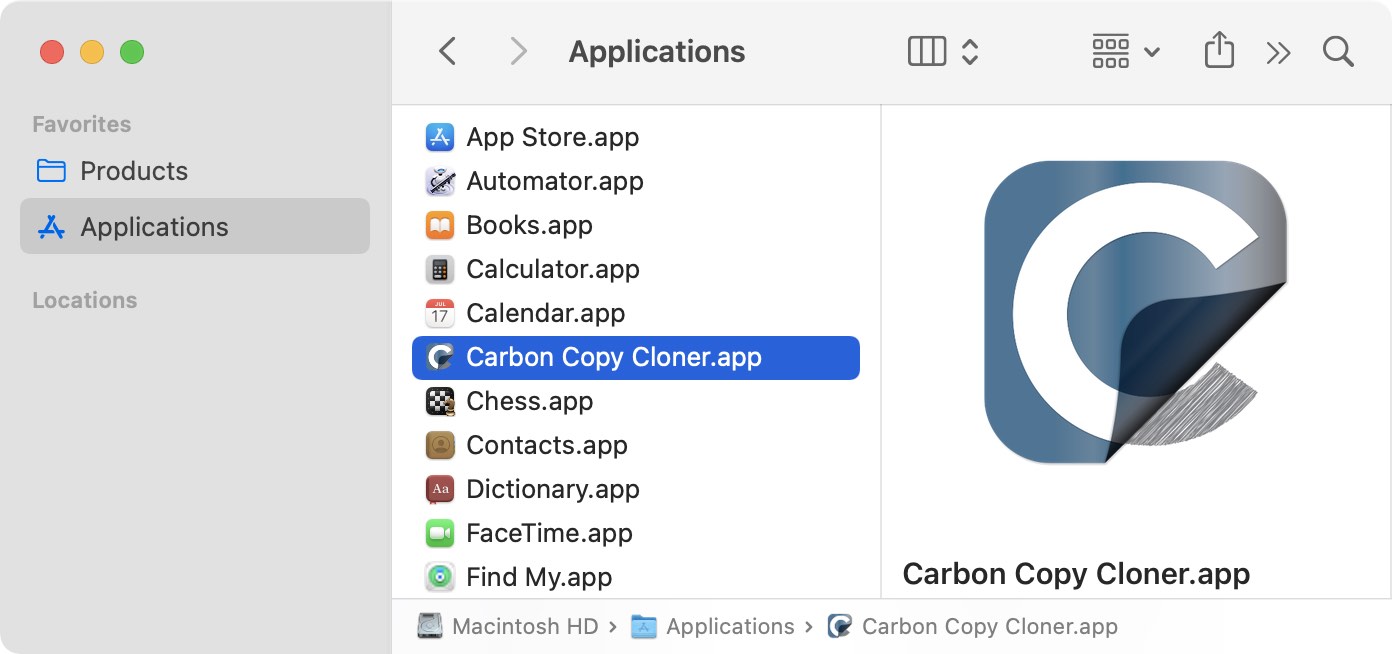
When your Mac has finished restarting, open CCC. Applications > Carbon Copy Cloner
Note: When you open CCC on your backup volume, CCC will prompt to guide you in setting up a restore task, in which case the instructions here are redundant. If you decline this offer, CCC will indicate that your regularly-scheduled tasks are suspended. If prompted, choose the option to leave your tasks suspended. Likewise, choose "Revert changes" if prompted to save your tasks.
4. Create a New Restore Task
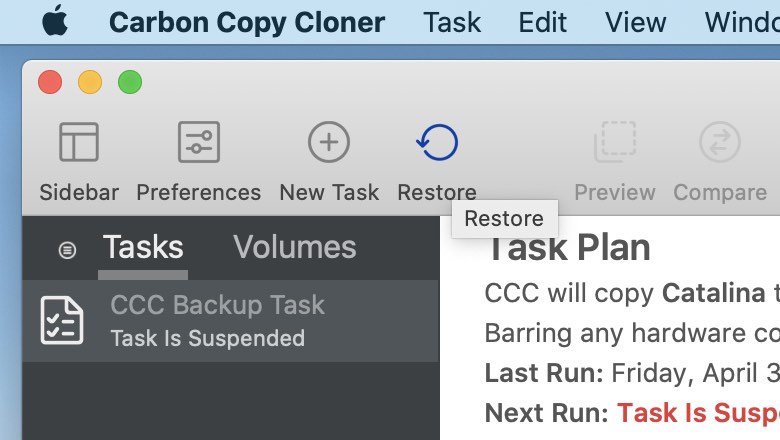
Click the Restore button in the toolbar or choose New Restore Task from the Tasks menu.
5. Select the Source
Click on the icon in the Source box to view available sources. Click to select your backup volume as the Source. You do not need to create a separate restore task to restore the System and Data volumes, CCC will restore both volumes.
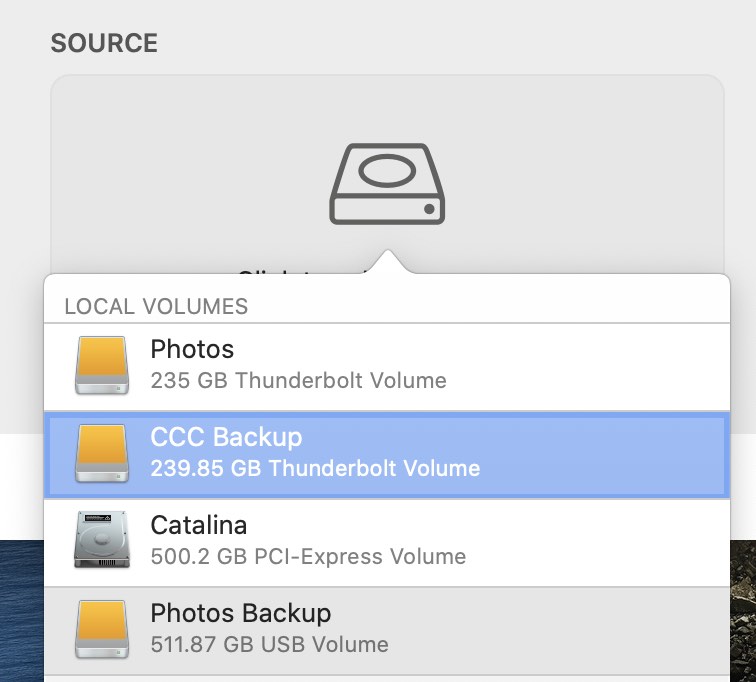
6. Select the Destination
Click on the icon in the Destination box to view available destinations. Click to select the volume that you want to restore to.
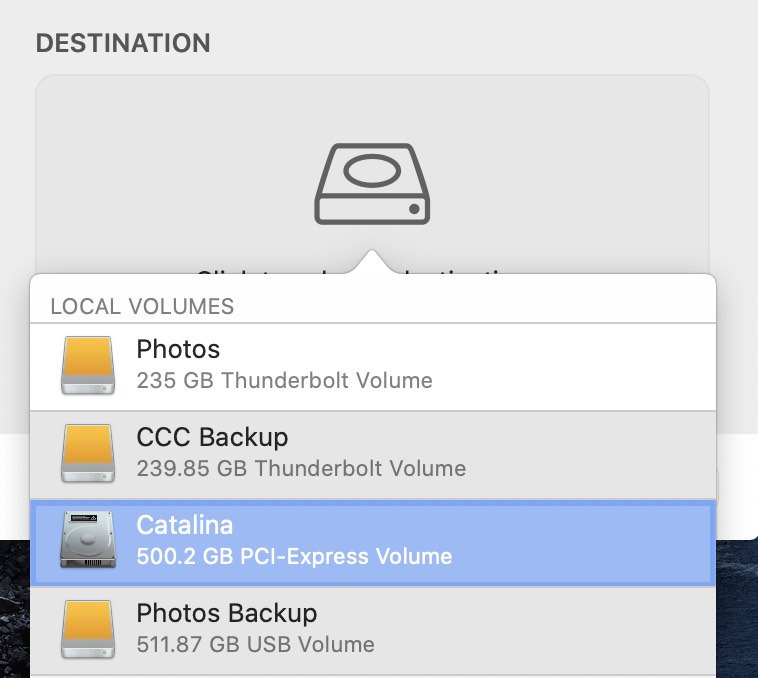
7. Click Start
Click the Start button in the lower-right corner to start the restore task.

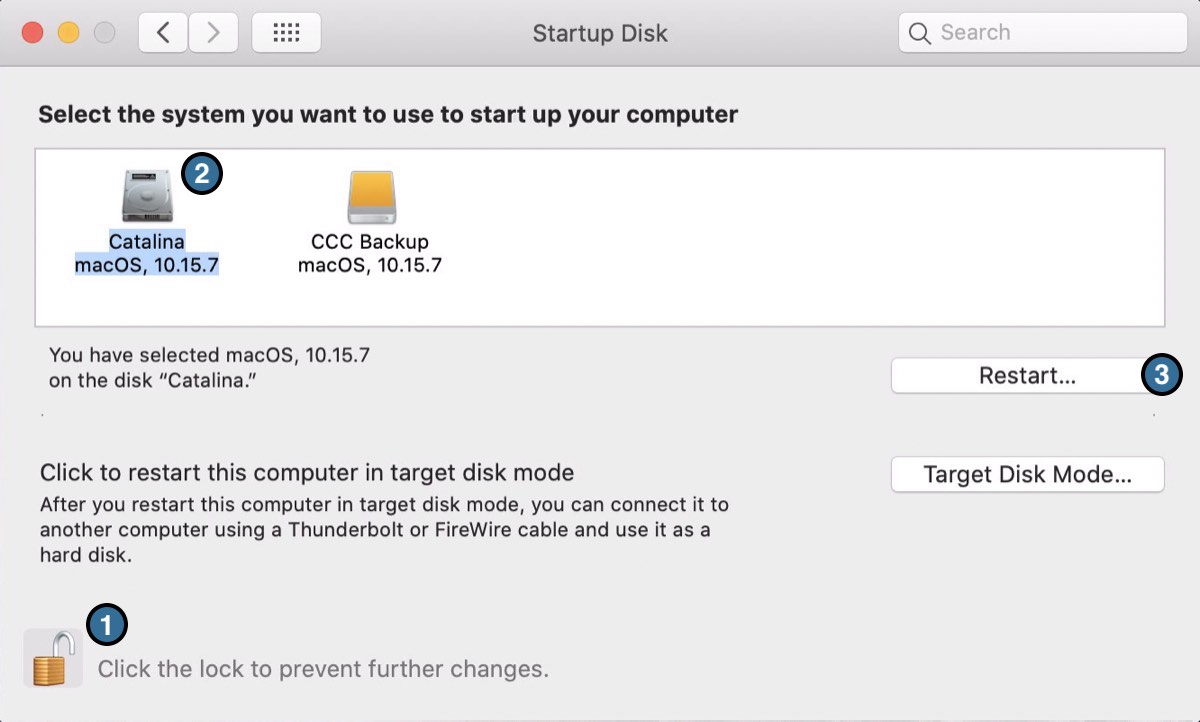
8. Reset the Startup Disk
Open the Startup Disk Preference Pane
After the restore is finished, choose Startup Disk from CCC's Utilities menu, click the padlock icon at the bottom of the window to authenticate, then reset the startup disk to your original startup disk and restart your computer.
Related Documentation
- Troubleshooting External Boot
- Restoring from a disk image
- "I have a full-volume backup in a folder or a disk image. How can I restore everything?"
Restoring from a backup on a NAS or network share
To restore data from a folder on a NAS volume:
- Close all applications and all Finder windows
- Open CCC and click the Restore button in CCC's toolbar to create a new restore task
- Drag the folder that you would like to restore from the network share onto CCC's Source selector
- Create a new folder at the location where you would like to restore data
- Drag that new, empty folder onto CCC's Destination selector
- Click the Start button
Bear in mind that NAS backups are not compatible with Migration Assistant. You can restore specific folders from the NAS backup, but you need a backup on locally-attached storage to restore your complete "Mac experience" (e.g. system settings, user accounts).
Restoring a home folder from a backup on a NAS to a clean install of macOS
As noted above, NAS backups are not compatible with Migration Assistant. If you have a new Mac or an otherwise clean installation of macOS, and your only backup is on a NAS volume, then the following steps are the Best Practices method for restoring the user home folders and creating new user accounts.
- Proceed through Setup Assistant, creating a new "utility" account. Do not use the same name as an account from the backup, and do not log in to iCloud.
- Mount your NAS backup volume in the Finder.
- Navigate to Macintosh HD > Users in the Finder. Create a new folder using the name of the user whose home folder you are restoring.
- Download and open CCC.
- Click Restore in the toolbar to create a new Restore task.
- Drag the user home folder from the NAS backup volume in the Finder onto CCC's Source selector.
- Drag the user home folder from the Macintosh HD volume in the Finder onto CCC's Destination selector.
- Click the Start button.
- When the restore procedure has completed, open System Settings > Users & Groups.
- Click Add User…
- Configure a new user account. Set the "Account Name" to the same name as the home folder that you restored.
- Log out, then log in to the restored user account. You may delete the "utility" account, if desired.
Migrating data from an Apple Silicon Mac booted in "Share Disk" mode
When Apple introduced Apple Silicon Macs, they replaced "Target Disk Mode" (TDM) with a new "Share Disk" mode. With TDM, you simply connect two Macs via FireWire or USB, and the storage of the TDM Mac appears and behaves as a locally-attached device. That device would be inherently compatible with Migration Assistant. Share Disk mode is completely different. Instead of behaving like a locally-attached device, the attached Mac shares a specific volume via SMB file sharing. That volume is not compatible with Migration Assistant, and due to some limitations of the SMB service on the sharing Mac, applications copied via the Finder do not work correctly.
CCC can work around these limitations and produce a backup of the Shared-Disk Mac that has functional applications and is compatible with Migration Assistant. Ideally you would have an ordinary CCC backup of the Shared-Disk Mac to use instead (i.e. a backup made while that Mac is booted from its own hard drive), but if you are only able to access the Mac via Share Disk mode, then you can use the following steps to migrate data from that Mac.
- Follow Apple's instructions for sharing the startup disk of another Mac
- Erase a new backup disk in Disk Utility to use as a destination for the backup task, or add a volume to an existing backup disk that has enough space for the procedure.
- Click the New Task button in CCC's toolbar.
- Select the Shared-Disk volume as the source.
- Select your local backup volume as the destination. Do not select your current startup disk as the destination to this task.
- Click the Start button to run the task.
- When the task has completed, eject the Shared-Disk volume and detach the second Mac.
- Open Migration Assistant and migrate data from the CCC backup volume.
CCC won't run automated tasks while a restore task is running
To avoid any potential conflicts, CCC will avoid running any automated tasks while a Restore task is running. This is designed to prevent mishaps, e.g. overwriting the backup while you're restoring the backup to another volume. If you have an unrelated task that you would like to run while a restore task is running, you can start that task manually to override CCC's safety mechanism.
