So Apple has shipped the next major operating system, and you're excited to upgrade! But are you ready? OS upgrades purport to offer new features, better performance and bug fixes, but they can come at a price — your time and potentially your productivity. If you upgrade your OS only to discover that a critical third-party application or peripheral doesn't work right, you could be really lost when you discover that Apple doesn't support downgrading to a previous OS. Downgrading is not an impossible task if you made a CCC backup prior to the upgrade, but it is a long procedure that may be too complicated for many users.
Should I upgrade my Mac?
Major system upgrades are often disruptive, so we have always recommended a very conservative approach to applying them. Consider the following:
- Is the upgrade required for my Mac?
- Does the upgrade offer any compelling features?
- Will this upgrade improve the performance of my Mac, or degrade performance?
- Does the upgrade fix a problem that is preventing me from effectively using my Mac?
- What software will no longer work after applying the upgrade?
- Does the application of this upgrade to my aging Mac hasten its obsolescence?
If the upgrade turns out poorly and you have to downgrade, you certainly may downgrade using a CCC backup from an earlier OS. These sorts of procedures require time and effort, though, so you should weigh that potential hassle against the potential gain of the OS upgrade.
Lastly, we recommend that any users that rely heavily upon the availability of their Mac for work or other productivity consider waiting for several OS updates before making a major upgrade. The early releases are exciting, but that excitement involves risk. Early adopters inevitably find some shortcomings and bugs which are resolved in minor OS updates.
Can I test the new OS before committing to it on my Mac's production startup disk?
Yes! Especially if you have lots of software that could be rendered unusable on the new OS, it's a great idea to test the new OS with your data in a manner that doesn't require a commitment on your production startup disk.
Do not use your production CCC backup for this procedure. This procedure will erase any backup history (e.g. snapshots) on the volume that you use. We recommend that you acquire an external hard drive, ideally an SSD, that has enough capacity to fit all of the data that is on your current production startup disk. See this CCC Kbase article for some recommendations.
- Prepare the new device for making a backup.
- Click "New Task" in CCC's toolbar to create a new task.
- Choose your startup disk in the Source selector.
- Choose your backup volume in the Destination selector.
- Click the Start button. When the backup procedure is complete, the destination will have a copy of all of your applications, user data and system settings.
- Open the macOS Installer (e.g. for the newer OS that you want to test).
- Click "Show all disks", then proceed to install the new OS onto the new external disk.
When the installation is complete, your Mac will boot from the external disk automatically, and all of your user data and applications will be "adopted" by the new OS. Open your apps, kick the tires, etc.
When you're done testing, reset the startup disk to your Mac's internal disk and reboot. You can then erase the new external disk and use it for some other purpose. If you're happy with how the new OS was working on the external test device, you can proceed to install it onto your Mac's production startup volume. If not, simply stick with the OS that you're currently running.
Make a CCC backup before upgrading
If you've read this far and you've decided to proceed with upgrading your Mac's production startup disk, the first thing you should do is make a backup of your Mac with CCC.
- Get a backup disk. If you would like a recommendation, we offer some here in CCC's documentation.
- Prepare your backup volume for the backup.
- Download CCC and open it.
- Choose your startup disk in the Source selector.
- Choose your backup volume in the Destination selector.
- Intel Mac running Big Sur+ (optional)†: Click on the Destination selector and choose "Legacy Bootable Copy Assistant", then click the button to allow CCC to erase the destination.
- Click the Start button.
- Detach your backup disk from your Mac and set it aside. Until you are ready to commit to the newer OS, you don't want the backup disk to be upgraded automatically by a scheduled backup task.
† Should I make a bootable backup?
Downgrading from a bootable backup requires fewer steps, but the reliability of Apple's External Boot solution has waned in the past several years. Having a bootable backup gives you an additional recovery option, but you can downgrade your Mac from a CCC backup whether that backup is bootable or not. The important thing to do is make the backup before you upgrade, and understand your downgrade options before proceeding with the upgrade. Apple Silicon Macs: You can make a bootable backup on these Macs as well, but the Mac's behavior while attempting to boot from an external device (backup or fresh macOS install) is pretty frustrating after you have erased the internal disk. We recommend the standard recovery procedure to downgrade an Apple Silicon Mac.
Upgrade to the new OS
Download the newest OS from the Mac App Store and apply the upgrade.
Make sure everything is working... then resume your backups
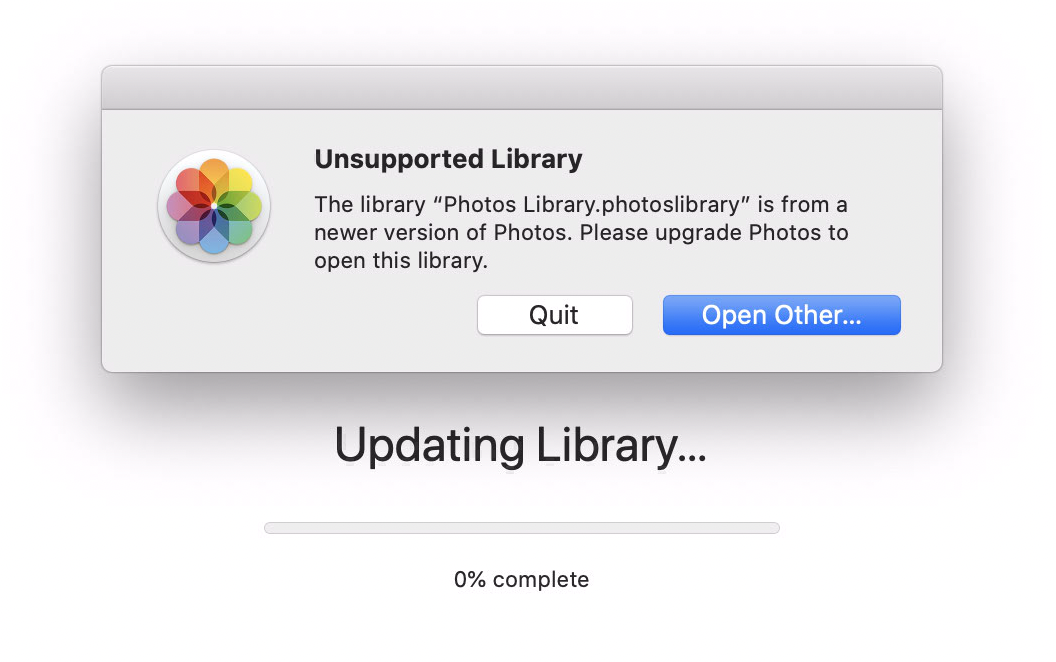
Take some time to run the applications that are most important to you. Keep in mind that when you open an Apple application (e.g. Mail, Photos, etc.) on the newer OS, those applications will immediately and irreversibly upgrade the user data for those applications. If you decide later that you want to downgrade, you cannot simply reinstall Big Sur (for example), then go about your day with the upgraded user data; the Big Sur versions of those Apple applications can't use the upgraded data from Monterey. If you need to downgrade to a previous OS, it is imperative that you have a CCC backup of your Mac as it was prior to the upgrade.
If, after a week or so you decide that everything is copacetic and you are ready to commit to the new operating system, attach your backup disk to your Mac, open CCC and re-run your backup task with the same settings. This is an important step — once the backup task has completed, you will no longer be able to use the backup to downgrade to the previous OS.
Downgrading your Mac with a CCC backup
Downgrading your Mac's OS with CCC
Note: If you created or modified any documents while the system was running the newer operating system, the older versions of your files will be restored. Unfortunately, your personal data created by Apple applications (e.g. Mail, Photos, etc.) while using the newer OS will be incompatible with an older OS, so it is not possible to restore changes that were made while you were using the newer OS.
Downgrading with a Standard Backup
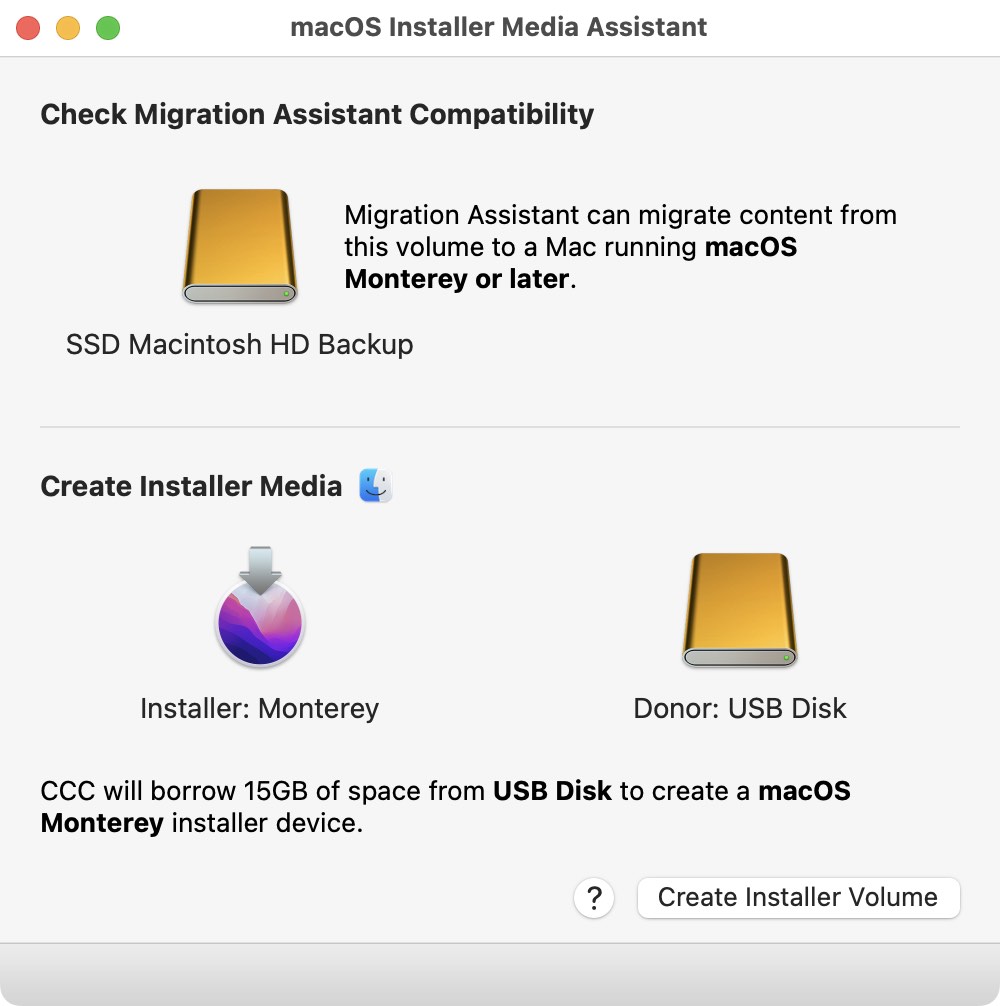
CCC's macOS Installer Media Assistant will help you navigate the more complicated steps of downgrading your OS. CCC's macOS Installer Media Assistant is available to CCC v6 license holders.
- Open CCC. If you have any tasks configured to run on a schedule, or automatically when the backup disk is attached, right-click on those tasks in CCC's sidebar and choose the option to disable them.
- Attach your backup disk to your Mac.
- Choose "macOS Installer Media Assistant" from the Utilities menu.
- Drag your backup volume onto the box at the top of the window to verify compatibility with Migration Assistant.
- Download a macOS Installer. Click on the macOS/Finder icon for convenient download links.
- Drag the installer application onto the box indicated in the Installer Media Assistant window.
- Drag an empty volume with more than 15 GB of free space from a USB or Thunderbolt device onto the "donor volume" box.
- Click the "Create Installer Volume" button.
- Restart your Mac while holding down the Option key (Intel Macs) or the Power button (Apple Silicon Macs).
- Select the installer device as the startup disk and proceed with startup.
- Open Disk Utility.
- Choose "Show all devices" from the View menu.
- Select the parent-level device of your Mac's internal storage in the sidebar.
- Click the Erase button in the toolbar. Erase the internal disk with the APFS format.
- [Intel Macs]: Quit Disk Utility.
- [Apple Silicon Macs]: Proceed when prompted to "fully erase the Mac".
- [Apple Silicon Macs]: The system will automatically reboot into Recovery Mode and prompt you to activate the Mac. Connect to WiFi or ethernet; the Mac will activate itself.
- [Apple Silicon Macs]: Shutdown, then boot the system while holding down the Power button.
- [Apple Silicon Macs]: Select the installer device as the startup disk and proceed with startup.
- Choose the option to reinstall macOS, then proceed to reinstall macOS on the internal disk of your Mac.
- When prompted during Setup Assistant, choose the option to migrate data from your CCC backup volume. Proceed as directed by Migration Assistant to migrate data from your CCC backup volume.
Downgrading with a bootable backup
If your CCC backup is bootable, then do the following to restore everything back from your last pre-upgrade backup. We do not recommend using this procedure for Apple Silicon Macs, please use the procedure above instead.
- Restart your Mac while holding down the Option key.
- Attach your CCC backup disk to your Mac (do not attach your backup disk prior to the first step).
- Select your CCC bootable backup volume in the Startup Manager and proceed with startup.†
- Open Disk Utility
- Unmount the original (upgraded) startup disk.
- Choose "Show all devices" from the View menu.
- Select the whole disk device that contains your original startup disk — the parent of the "Macintosh HD" volume.
- Click the Erase button in Disk Utility's toolbar. Erase the internal disk with the APFS format.
- Open CCC and click the Restore button in the toolbar to create a new Restore task.
- Select your backup volume from the source selector.
- Select your original (now empty) internal volume from the destination selector.
- Big Sur (and later): Click on the Destination selector again and choose "Legacy Bootable Copy Assistant", then click the button to allow CCC to erase the destination.
- Click the Start button.
- When the restore process has completed, restart your Mac while holding down the Option key.
- Select the restored volume in the Startup Manager.
- When the system has rebooted, reset the startup disk selection in the Startup Disk Preference Pane.
† Intel T2 Mac users: If you're downgrading to Catalina and your bootable backup is encrypted, we recommend using the "Downgrading with a Standard Backup" procedure above instead. See macOS Catalina Known Issues for additional context.
"I don't have a pre-upgrade backup, and now I want to downgrade. What can I do?"
Downgrading (to macOS Monterey or later) without a pre-upgrade CCC backup is possible (using the procedure described above), but will not be as successful. There are some items that the older system applications can't read, e.g. Apple Mail, Photos – basically all of the Apple applications won't be able to use the upgraded data stores.
Additional Resources
- Everything you need to know about CCC and APFS
- Preparing your backup volume for an installation of macOS
- Working with Disk Utility to prepare your CCC backup disk
- Testing your CCC backup
We're here to help
If you get stuck or need some advice, you can get help right from within CCC. Choose "Ask a question" from CCC's Help menu to pose a question to our Help Desk.